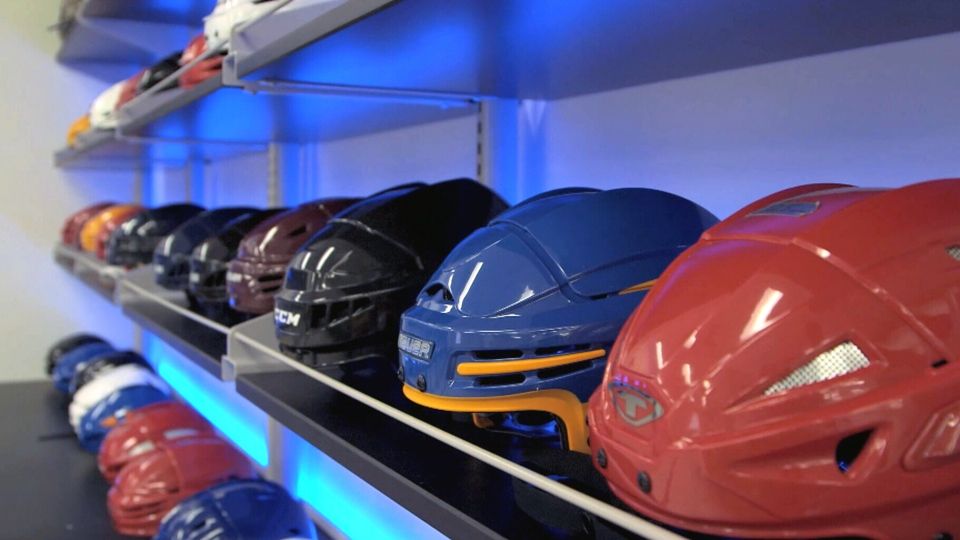
A hockey helmet is not a fashion choice and it is not a concussion guarantee. It is protective equipment that only does its job when it is current for the league, the right size for the player, correctly adjusted, paired with the required face protection, and left unmodified. Those facts matter more than foam marketing, a famous player’s endorsement, or whether the shell is on sale.
Our buying advice begins with a slightly unglamorous rule: buy the helmet that fits, carries the certification your league requires, and is in sound condition. A premium model that moves on the head is the wrong helmet. A lower-priced, certified model that sits level and stays stable can be the smarter purchase. Try helmets in person when you can; if you order online, keep the packaging intact until you have completed a careful fit check.
Our picks at a glance
- Best premium fit system to try: Warrior Alpha One Pro is worth trying for players who want a dial-style adjustment system and its shape agrees with their head.
- Best mainstream adjustable option: Bauer RE-AKT 150 is a feature-rich model to compare in person if its certified version meets the player’s league requirement.
- Best value route: CCM Tacks 70 represents the basic certified, adjustable category that is often enough for a recreational player when fit is sound.
- Best for a growing player: a new, certified, properly adjusted model that fits now—not an oversized helmet bought to last for years.
- Best used-buying rule: skip used helmets with any crack, missing liner, loose part, unknown history, altered certification label, or questionable fit.
Certification comes before the model name
Check the governing body for the games the player will actually enter. In Canada, Hockey Canada requires a CSA-certified hockey helmet and facial protector used as a system according to its rules. In USA Hockey-sanctioned play, rules require the applicable HECC-certified helmet and face protection for the relevant age classification, with a current sticker. Other leagues, schools, tournaments, and adult organizations can impose their own requirements. Verify with the league before buying—not on the way to the first game.
Certification is physical, not a phrase in an online title. Find the original certification label on the helmet and examine it before removing tags. Match the helmet model, face protector, and any required chin protection to the manufacturer’s instructions and the league’s rules. A marketplace listing that says “approved,” “hockey style,” or “pro level” does not prove that the product in your hands meets a current requirement.
Be careful with regional confusion. A marking that matters in one jurisdiction may not decide eligibility in another, and an HECC sticker’s date is not a universal indication that a helmet is automatically at the end of its physical life. Certification terms, league rules, and manufacturer directions are separate questions. If any of them are unclear, ask the league equipment manager or the manufacturer before the helmet gets onto the ice.
Fit is the primary performance feature
Measure head circumference as a starting point, then use each manufacturer’s chart only to select sizes to try. Different helmet shells suit different head shapes. A number on a tape measure cannot tell you where your forehead, temples, occipital area, or hair volume will meet the liner. The fitting test must happen with the player wearing the helmet, not by squeezing the shell in the store.
Set the helmet low and level so the front sits just above the eyebrows rather than tilted back like a cap. It should make even contact without a painful hotspot. Adjust the shell or dial according to the model’s directions until it feels snug. With the chin strap fastened, shake the head side to side and forward and back. The helmet should move with the head instead of sliding independently, but it should not create numbness, a headache, or pressure that makes the player want to loosen it after five minutes.
Next, fit the complete system. The appropriate cage, shield, or visor has to mount as directed, sit in the intended position, and work with the helmet’s chin strap. The chin cup should touch the chin comfortably and the strap should be secure rather than hanging loose. Ask a knowledgeable shop employee, coach, or equipment manager to check a youth player’s first fitting. Small errors—an overly loose strap, an uneven side adjustment, a cage mounted at an odd angle—are easy to miss in a mirror.
How to tell when a helmet does not fit
| What you see or feel | Likely issue | Better move |
|---|---|---|
| Helmet rocks when the player turns their head | Too large or insufficiently adjusted | Try a smaller shell or a different model shape |
| Front rides high above the forehead | Wrong size, wrong position, or rear adjustment issue | Reset the fit; do not accept the “baseball cap” look |
| Sharp pressure at one temple or the forehead | Shell shape mismatch or over-tight adjustment | Try another model; do not expect a pressure point to disappear |
| Chin strap hangs below the chin | System is not secured | Adjust it correctly before the player skates |
| Helmet fits only with the adjustment fully open or closed | Little room for a secure fit over time | Try the neighboring size or another platform |
Do not buy a helmet “to grow into.” An oversized helmet can shift away from the area it is meant to cover, and a child’s growth does not make poor fit safer in the meantime. Recheck fit during the season. Hair changes, padding settles, the player grows, and straps can loosen. A minute in the locker room is a worthwhile safety habit.
What the price tiers really buy
At the entry level, you are usually paying for a certified shell, basic foam liner, and a simple adjustment range. That can be a sound choice for a recreational player if it fits well and has the required certification. Do not treat price as a safety score. A helmet’s certification is a baseline; personal comfort and correct fit determine whether the player will wear it as intended.
Midrange and premium helmets often add more elaborate liner materials, more adjustment points, dial systems, improved airflow, or a more refined finish. Those features may make a helmet easier to fine-tune and more pleasant through a long practice. They do not eliminate the risk of concussion or make risky play safe. Avoid any vendor language that implies otherwise. No helmet can prevent all head injury, and a player with suspected concussion symptoms needs to leave play and follow the team, league, and medical protocol.
Use the premium budget for fit and replacement flexibility rather than status. A player whose head shape is happiest in a modestly priced model should choose it over an uncomfortable flagship. A parent of a growing young player may reasonably prioritize current fit and a legitimate return policy over the most feature-filled shell. The best helmet is the one you can verify, fit, maintain, and replace when required.
Product lines worth trying—not blind-buying
Warrior Alpha One Pro for dial-style adjustment
The Warrior Alpha One Pro is a premium option to consider when a player prefers a dial-style adjustment and the one-piece shell profile sits naturally on their head. The reason to try it is adjustment feel, not a promise that it is “best” for everyone. Confirm the exact model’s certification, try it with the player’s intended face protection, and assess it after standing and skating posture—not just a quick store try-on.
A dial cannot fix a wrong shell shape. If tightening creates a single hard pressure point before the helmet stops moving, try another platform. Likewise, keep the manufacturer’s adjustment components intact; a missing pad, homemade spacer, or modified shell changes the system from the one that was certified.
Bauer RE-AKT 150 for feature-minded players
The Bauer RE-AKT 150 belongs on an in-store comparison list for players who want a premium adjustable helmet from a widely stocked line. It offers a different shell shape and adjustment approach from Warrior and CCM models, which is exactly why comparison matters. Treat the model name as an invitation to fit it, not as an automatic winner.
When comparing premium helmets, wear each one for several minutes with the chin strap correctly fastened. Move the jaw, look down as if tying skates, look up, and turn the head. Ask whether the shell stays quiet and stable without a pressure point. The less interesting answer is often the one that will be most comfortable in the third period.
CCM Tacks 70 for the basic, current-fit category
The CCM Tacks 70 is an example of the basic adjustable helmet category worth trying for entry-level and recreational play. A simpler helmet can make sense when its certification and fit are correct. Put the saved money toward the required face protection, a proper fitting, and a reputable retailer rather than assuming that an expensive helmet is mandatory for a safe setup.
Check the current listing carefully because product families, sizes, and certifications vary by market. If a listing is unclear, choose a retailer that can confirm what you are buying. This is one category where a vague online bargain is rarely worth the uncertainty.
Face protection, accessories, and modifications
Buy the face protection the player’s league requires and mount it only as instructed. A cage, full shield, half visor, or goalie mask is not an interchangeable styling part. Make sure the helmet’s mounting hardware is complete, the protector is compatible, and the chin protection is used where required. Do not substitute a lacrosse, cycling, football, or novelty helmet for a certified ice-hockey helmet because the shell looks similar.
Do not paint the shell, drill holes, remove ear loops, relocate hardware, cut foam, or cover certification labels. Avoid third-party attachments unless the manufacturer and league specifically permit them with that model. Seemingly harmless stickers or accessories can affect the shell, certification, warranty, or rule compliance. Helmet certification applies to the product in the condition in which it was evaluated—not to every personalized version a player can invent.
For a player asking about a padded outer cover or a new add-on seen online, check the current league rule and manufacturer direction first. A “safer-looking” addition can be prohibited or can invalidate certification. Safety equipment is one of the few areas where doing less modification is usually the sophisticated choice.
When to replace a hockey helmet
Replace a helmet with a cracked shell, loose hardware, broken or missing liner pieces, a compromised fit system, a damaged cage attachment, or any alteration that conflicts with certification or manufacturer instructions. Replace it after a severe impact when the manufacturer or qualified equipment guidance says to do so. Storage and history matter too: a helmet baked in a hot car, exposed to harsh chemicals, or passed through several unknown owners is a poor bargain.
There is no single calendar date that can inspect a helmet for you. The right replacement decision depends on condition, use, storage, impacts, certification requirements, and current fit. Keep the labels readable. Clean it as the manufacturer directs, air it out after skating, and avoid solvents or improvised repairs. A helmet that smells bad is a cleaning problem; a helmet that no longer fits or has damage is a replacement problem.
Used equipment can be sensible for some hockey gear, but helmets require a higher bar. You must be able to inspect the shell, liner, hardware, label, and fit—and you should know its history. If you cannot, buy new. The cost difference is not worth guessing about a protective item that sits on the head.
Buying checklist
- Confirm the actual league’s current certification and face-protection rules.
- Measure the head, then try multiple brands and shell shapes.
- Fit the helmet level, snug, and stable with the chin strap fastened.
- Wear the intended cage, shield, or visor during the fitting check.
- Inspect the certification label, liner, shell, hardware, and adjustment system before use.
- Do not buy oversized for growth or modify the certified setup.
- Recheck fit periodically and replace damaged or noncompliant equipment.
Frequently asked questions
Does an expensive hockey helmet prevent concussions?
No helmet can prevent all concussions or all head injuries. Price and technology claims should never displace correct fit, current certification, safe play, and a proper response to a suspected injury. If a player has symptoms after a hit, follow the applicable removal-from-play and medical process.
Can I buy a used hockey helmet?
Only when you can verify its condition, certification, fit, and history. In practice, a new certified helmet is usually the safer and simpler option for a player who will use it regularly. Skip any used helmet with cracks, missing parts, unreadable labels, modifications, or unknown impact history.
How often should I recheck the fit?
At the beginning of each season, after a growth spurt or haircut change, and whenever the player says it feels different. A fast check before games is sensible for youth players. The helmet should sit level and stay with the head.
A five-minute shop fitting routine
Use a repeatable routine so the flashiest helmet does not win by default. First, loosen the model according to its instructions and place it level on the player’s head. Second, make the adjustment snug enough that the shell moves with the head. Third, fasten the chin strap and fit the actual face protector required for play. Fourth, have the player look down, look up, turn side to side, and mimic a few skating movements. Finally, ask where it presses. A pressure point that appears only when the shell is secure is useful information: that model is probably not the right shape.
For a child, listen to the answer rather than deciding that a tight helmet must be correct. “Snug” does not mean painful. If the player complains about headache, pinching, or pressure at a single spot, try another shape. Conversely, do not accept a helmet because it feels comfortably loose. It needs to stay in place during a fall and through ordinary head movement, which is why the head-shake check matters.
Once you choose a helmet, take a photo of the properly adjusted side and front views for a youth player’s equipment bag. It gives a coach or parent a quick reference when straps get reset after cleaning. Keep the manufacturer manual with the receipt. The manual explains approved adjustments, care, and component replacement; the receipt makes a warranty or return conversation easier if a defect appears.
At home, store the helmet somewhere dry and away from direct heat. Let it air out after skating instead of sealing it wet in a trunk. Wipe it only with the cleaning method the manufacturer permits, and check screws, clips, and the chin strap before the next session. Routine care cannot restore a damaged helmet, but it makes a developing issue easier to spot before game day.
The bottom line
Start with league-compliant certification and a helmet that fits now. The Warrior Alpha One Pro, Bauer RE-AKT 150, and CCM Tacks 70 are useful models to try at different price points, but no product name beats a stable, comfortable fit. Keep the certified system intact, use the required face protection, and replace any helmet that is damaged, altered, or no longer appropriate for the player.
For equipment that carries and protects the rest of your kit, see our hockey equipment bag guide.
Our approach: We explain the trade-offs behind every recommendation. If you buy through an Amazon link, SuperGrail may earn a commission—our research remains independent.